Continuing from my post last week about the install and configuration of Databricks Connect I am continuing with the steps required to install Visual Studio Code in which you will write commands/scripts.
Firstly a definition is in order, Visual Studio Code (VSC) is a lightweight source code editor which is available for Windows, macOS and Linux. It differs from Visual Studio in that it is not a full IDE.
Install
We need to carry out two steps:
- Install Visual Studio Code if it is not already installed.
- Install the Python Extension for Visual Studio Code (VSC).

FYI, this post is based on the following version of VSC:
Version: 1.46.1 (user setup)
Commit: cd9ea6488829f560dc949a8b2fb789f3cdc05f5d
Date: 2020-06-17T21:13:20.174Z
Electron: 7.3.1
Chrome: 78.0.3904.130
Node.js: 12.8.1
V8: 7.8.279.23-electron.0
OS: Windows_NT x64 10.0.18363
Configuration
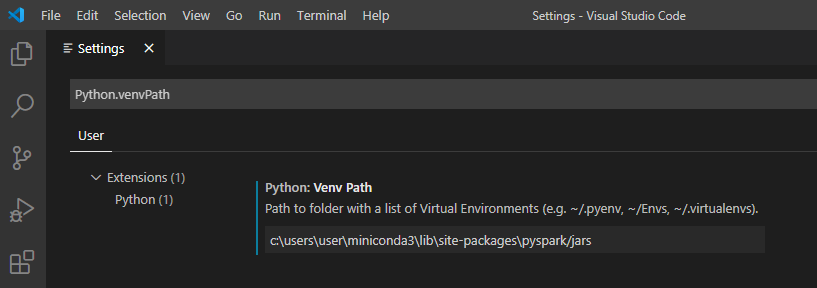
Ok assuming you now have VSC installed and the Python Extension we need to configure the setting python.venvPath to tell VSC where the Python environment is located. This achieved by running the following from the command line to obtain the location of the Python environment:
databricks-connect get-jar-dir
This will return the location of the Python environment. In the example below it is
c:\users\user\miniconda3\lib\site-packages\pyspark/jars
Take the path returned, open VSC and add the path to Python: Venv Path via the Settings tab:

Testing
You will now be good to go and able to send commands to the Databricks clusters previously created.
- Launch Visual Studio Code
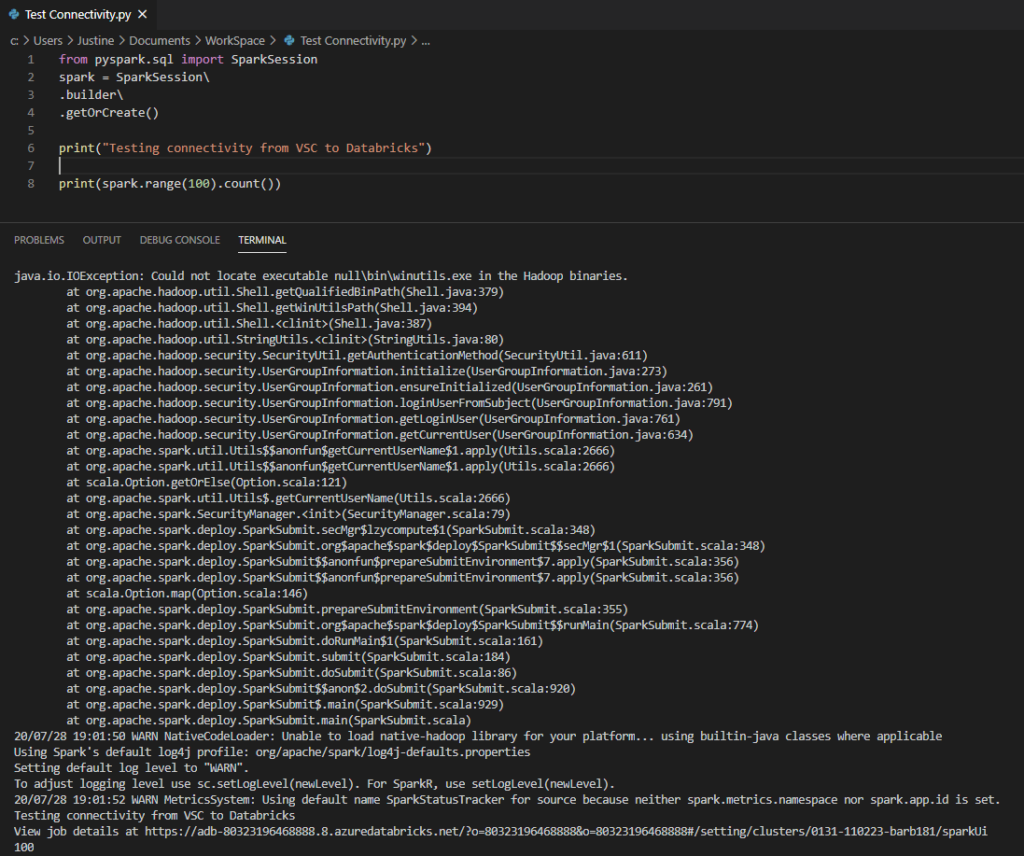
- Create a new file. In this case it is called Test Connectivity
- Paste the following command in the Terminal Window
from pyspark.sql import SparkSessionspark = SparkSession\.builder\.getOrCreate()
print(“Testing connectivity from VSC to Databricks”)
print(spark.range(100).count())
Final step is to run the script and hopefully you will be greeted with the following


